Monday, February 22, 2010

File Under... Things To Make

Vampire Mirror

I'm not sure if this would work on not but I'd sure like to try it. If you're out there and reading this, and DO try it, please let me know how it goes.

Imagine that you are looking through a 2-way mirror. Like the standard viewing mirrors found in police interrogation rooms from the movies. You can see through it as if its a window, but anyone on the other side only sees mirror. On the other side of the room is a large mirror, the same size as the room facing you. What would you see? If there is a person or furniture in the room of course you would see those things, but what if there isn't. All you will see is a mirror reflecting another mirror. What would that look like? You would be looking into a mirror and seeing only a mirror.

I'd like to build a smaller version of that scenario that's only about the size of a medicine cabinet. It has a 2-way mirror as it's face, so you can look through from your side but anything on the other-side cannot pass through. A thin box separates this mirror from the back which is a regular reflective mirror. The box is open at the top to let light in.


File Under... Photoshop Geek-out

Solar Curves:

I guess people started calling these things "solar" curves because they can make an image seem "solarized". Its not really what they're used for though.

The idea is to make a curve that racks the color information of an image so much that it exposes parts of the image that you don't normally see. I have two different curve presets that I use regularly. One I call "Solar" and one I call "Dusted".
"Solar" is a wild curve with a very regular wave pattern and "Dusted" has an irregular wave pattern.


Notice how "Solar" turns some areas black and "Dusted" turns those same areas white. Also notice how one pushes the neutral background toward magenta, and the other pushes it toward green.

The biggest benefit of using these curves is that they make retouching mistakes very apparent. Note the poorly retouched hair edges. They're also helpful to expose things like lens dust, patterns, or irregularities in gradients and very dark or very light areas.

If you use both curves together, it makes the image very dusty looking. Which other than a nod to Guided By Voices, is where the name "Dusted" comes from.

Another easy way to get a similar effect is to set a curve adjustment layer to exclusion blending mode - and maybe add an invert adjustment layer above it.

Sunday, February 21, 2010

File Under... Video Art (I'd like to see)

Dual projection : a sunset played in reverse shown next to a projection of a sunrise also played in reverse.

Monday, February 15, 2010

File Under... Photoshop Geek-out


I've decided to start posting some of the out-of-the-ordinary Photoshop techniques that I've picked up over the years. I'll try and limit them to techniques that are actually useful.


Here's the first:


Saturation Maps:


You've probably noticed that it's pretty simple to make an additional channel in Photoshop using one of the existing channels in your file. For example, if you're working in RGB it's simple to make a copy of the blue channel which can then be used as a mask. It's possible (and common) to make channels from the Red, Green, Blue, Cyan, Magenta, Yellow, Black, and even the L, a, and b channels. But have you ever tried making a channel from the saturation values of HSB? There's not a straight-forward way of doing it since these channels don't have a preview in the channels palette.


My favorite way to make a channel from the S values of HSB is using a Selective Color adjustment layer.


Here's how to do it:


Create a new selective color adjustment layer. Make sure that the relative / absolute toggle is set to absolute. Go through each color and set the black value slider to -100. Then under the white, gray, and black sections set the black values to +100. That's it. Areas of high saturation look white and areas of low saturation look black with gray values representing the range between. Using an adjustment layer in this way is quick and very flexible. If you save a preset of the selective color settings you can quickly load it when you need it and can save the time it takes to set all those values.


This can be a very helpful tool to use especially when retouching high-end beauty images where skin tones need to be very finely adjusted. It can also help point out problem areas where saturation values drop off too quickly in shadow or highlight areas which is common in some digital images.


Here's another way:


Adobe provides a special plugin that will convert RGB files to either HSB or HSL color information. But this plug-in doesn't come with the Photoshop install disk. The download of this plug-in can be found here:

Legacy Optional Plug-Ins

After installing the plug-in (dragging it into the plug-in folder and restarting Photoshop) you can run it through the filters menu under "other".


The channels palette will still be labeled RGB, but you'll notice that the RGB channels have been replaced with information relating to their respective HSB/HSL values. It works well, but it's not the most flexible or efficient way of working for me, and I don't really use it.


Thursday, February 11, 2010

File Under... Musics
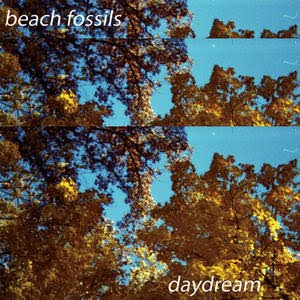

Beach Fossils

From Brooklyn, NYC. Dustin Payseur. They haven't released a full album yet, but hopefully they're working on it. I like it.

Here's a sample:

Sunday, February 7, 2010

File Under... Things To Do

Ok. So this is something called "Harried Walking".

Here's how it works:

Step one: look for signs, and write them down.
Throughout the day, or week, or whatever time period makes sense, take note of objects or events that present themselves to you as "signs". This could be anything. The point is that you be on the look-out for signs and make note of them. For example: yesterday out of the blue, I was making fun of the movie K-Pax with Kevin Spacey, saying that it was about an alien who was "paying it forward". Last night on Saturday Night Live, they mentioned the movie K-Pax and said that it was an under-appreciated classic (or something like that). Is this a sign? I don't know, but it stands out as something definitely out of the ordinary at the least. So I'm writing in my Harried Walking journal: "K-Pax / Kevin Spacey". Here's another example of another potential sign: There is a small park outside of my studio window. There is a bust statue in the park facing east. There are three plastic chairs in the park. Two of the chairs have been blown over by the wind and both are facing east. I'm writing in my Harried Walking journal: "a bust of a man and two vacant chairs pointing east." Again, I have no idea that this is truly a sign and even if it is, I have no idea what that means. But, it seems strange anyway. So I write it down.

Step two: follow the signs.
The next step puts your notes into use. Heres what you do: go for a walk, or a drive, or whatever, but make sure you have no pre-defined destination or course. Instead, use the signs from your journal as a guide book or a map. For example, If I decided to go on a Harried Walk right now, I would first go east because of the 3 east facing indicators from the park. I would probably go 2 blocks (the empty chairs) and then look for a man on the third block. Maybe there's a few men. How do I choose which one to notice? Maybe one looks a lot like Kevin Spacey? I would choose him, follow him or watch him for a clue to the next direction. Maybe he's giving directions to someone and pointing north. So I go that way.

If anyone who reads this, tries it, PLEASE let me know. If I get a chance to do it, I'll post my findings here.